Wednesday, March 22, 2006

Digital Picture Frame 2.0 part 1

So, the new and improved digial picture frame is nearing completion. I have been busy, with life and not had time to document the work that I have been doing with my various projects.

I have changed Jobs and been on vacation for the last little while, turned down what could have been an interesting Job with Gshop.com, and made Lemonchello out of Everclear and a lot of lemons.

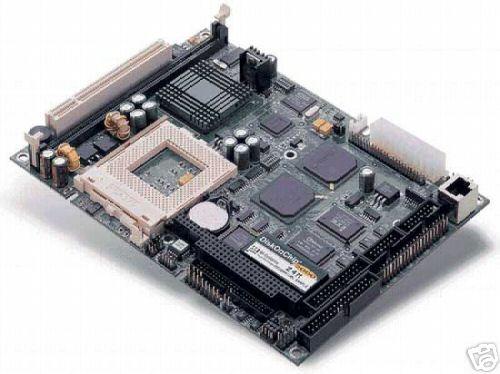
After all of that, I have finally gotten around to ordering one of the very small ATX power adapters for my Aaeon motherboards, and am egarly awaiting its arrival. This size will allow me to fit everything, LCD, motherboard and powersupply in the case I build on the back of the picture frame.

In my testing I figured out that the motherboard is not compatible with modern powersupplies. It does not have a power switch header on the board so I will be soldering the green pin and ground to a power button salvaged from a different computer case. For a hard power break I will have an on/off switch on the bottom of the frame for when I need the power off immediately.

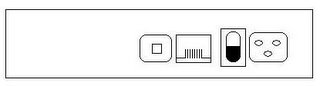
I was thinking something like this would be a good layout:


The os is still going to be Damn Small Linux and I am still going to use Dalbum for the slideshow and power the website with Xammp. I knew that Damn Small was easy to use, but until I did a click and run install of samba, I had no idea how easy it was.

I choose to stick with this combo because I still believe that it is a really flexible solution, and robust enough to run all the time. I will have a pictures directory open as a samba share and my wife can add photos, and browse to the reindex page after she adds photos.

Tuesday, March 07, 2006

First try Digital Picture Frame

Every where I read there seems to be a digital picture frame popping up, home made from a laptop, or new product release from a company. Well this is the sad story about the former.

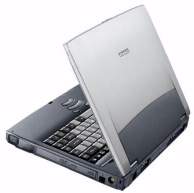
To begin with I picked up the husk of a Toshiba tecra 8100 latop that was about to find its way to the recycle pile. Not much, but from these humble beginings I saw a world of digtial photos rotating by that could be added to via wireless networking. So easy to work with, I could let my wife play with it and never worry about it again.


I went ahead and tore apart the Tecra with gusto and here is what was left


I purchased this lovely photo frame partly because it was huge enough to hide any enourmous boxes that I might attach to the back of the frame, and it was nice to look at (aka the wife approved).


This is the unfortunate end of the photo stream. Though the frame was completed and fully configed, the disk controller failed on the board and I was forced to throw out the laptop and hit the drawing board for version 2.0.

The tecra 8100 had a 500mhz proc and 128mb of ram, and I believe a 5gb hard disk. For an os I went with a hard disk install of DSL 2.0 and installed xampp (formerly known as Lampp) The photo software was DAlbum.

Xampp gave me all the simple config of apache and php, and DAlbum was very easy to install after I ran the Xampp auto config scripts. I followed the DAlbum sites instructions on enabling the Slideshow and created an album and index. At first I started looking for ways to force DAlbum to only show slideshows by default, but after searching the the DAlbum Forums I came across someone asking to have DAlbum Slideshows Launch in a new window. The siteadmin explaination of how to open a slideshow in a new window was short, but very insightful. In short I used some of their ideas and created a solution that works well for DSL. When the system first comes up it pops up a dillo webpage with some info, so I edited the config file and pointed it at my on custom launch page that opened my slideshow full screen. All that was left to do was some small edits to the slideshow.php file and this was a very functional slideshow of my photos.

This solution was completed, and Working for little more than 48 hrs. I got cocky and wanted to show people at work what I had done, well typical Seattle for you it rained and got my baby wet. After I get it inside the building and dried off I started to recieve disk controller failure Messages. The drive was fine, but the conroller on the board was done, and since it was a Laptop and doesn't have a 2nd channel I was forced to surrender.

Version 2.0 will be much more robust.

Sunday, November 20, 2005

Oh wasted time where have you gone

It looks like the hours I spent prepping for my special motherboards was all for naught. Once I finally got the cable kits from the regional distributor (apparently the company didn't have any and needed to make them) I figured out there is no way the case will work. In the regional reps defense Ken the rep I was working with did have to put in quite a bit of effort for what turned out to only be a $70 order out of me. In the end he drove them from Bellevue to my doorstep in Seattle the day he got them (probably to shut me up).

So now that everything is here I set to trying to cram everything into the case. I most likely could get the board ram and proc and a severely modified powersupply into this damn case, but no optical drives and certainly no full sized ide drives. A number of other students from netdesk and I are talking about setting up a domain for testing and finishing our Certifications so I thought one of these could certainly run as a global catalogue server, so I have started looking for a rackmount 1u server case (preferably empty) to host this little side foray.

I designed and priced a custom aluminum 12"x10"x3.24"clam case at emachineshop.com. Holy cow $375 for two really plain custom cases is really steep (in my mind). So $50 for a server case (after shipping) and $20-$30 for a 1u server power supply I think I am better off just using a server case in the end. If I had thought about it I could have saved myself 40 or so hours of grinding, cutting sanding and bending atx case steel, or I could have had the front and back covers made for what that time was worth. lesson learned I guess

Friday, October 21, 2005

Old/Completed Project Redux

Before I started this blog I was actively modifying and building things, I just never thought to write about them. To remedy this and post some of the messes I have created previously read on.

My personal favorite is the desktop rack:

I started with a single rack strip for a rack cabinet from a previous employer that was left over from my setting up their Data Center. I carefully measured the rack strip and determined that it was divisible by 4 in such away that none of the cuts would intersect with a screw hole. I cut the aluminum with carbon fiber cut off wheels and a dreme. After the cuts I had for Approximately 17 in tall pieces that looked like this.


I stacked them together and used zip ties fished through the holes to force them to line up and ground all of them even so that every piece would have the same distance top and bottom to a hole. As a result the rack is level and the holes to line up. I used large 3U rack cabinet spacer panels to form the sides and smaller 1U spacer panels to hold the rack square.

I purchased some Plexiglas and aluminum flat bar stock to create a custom Plexiglas shelf that fit in the top of the rack to help hold it square (though my custom L brackets lack of uniformity cause the whole cabinet to warp slightly.) I have threatened to get 4 custom machined L brackets to fix it, but I was able to flex them enough to get the cabinet to appear to be level that I have never bothered. I use the Shelf to hold a printer and my networking gear in the office, but so as long as we are renting and I cannot pull cable that Switch is going to continue to look lonely.

Thursday, October 20, 2005

People who post Daily are My Heros

Seriously, who has that much

A. Time
B. Energy

So Engadget and Hackaday(yeah I know they get paid so would I if people read this and click on a few links), way to have more time and energy then I can muster in my 4 days a week off.

Pimp My Rack

Get Your Rack Pimped!

Appologies in advance to Canford.co.uk but your site layout made me affraid to not take the images to my own host, (and bandwidth leeching is bad). If any of the products you see in this post interest you please go there, these are not my ideas. I just wanted to write about them and have the images.

That said, every thought the data Center was dull and needed a face lift?

Ever thought to yourself while disecting a downed server in your companies cage "I want a $Cold_Alcoholic_beverage"?

Well now you can, that's right Rack mountable accessories!


Monday, October 03, 2005

Carputer: update

All right, I have now acquired a slimline DVD drive, and an atapi/ide converter for use in the car computer. I also have received the motherboard that I intend to use. The boards are the AAEON PCM-6890B which use good old socket 370 procs up to PIII 1.o ghz. Everything on the board is a header, so you can pick and choose what you want to have available in your case. I think that the boards are pretty sweet for embedded development.


I have now purchased almost everything I think I am going to need to complete the build on this project, the only thing left is the deal breaker, a touch screen interface for the car.

I am very torn on this part of the project as I have several choices, and some of them are down right affordable. I just can't make up my mind to waste $300 all at the same time.

I will try to get some pictures of the board in the new case, but I am fighting a cold and my work has been loosing people left and right so I have been working a lot of extra days. Not to mention, everyone seems to want my time lately.

Tuesday, September 13, 2005

Carputer

So I have started construction on a computer that will live under the seat of my car for mp3's dvd's and gps. (maybe some evdo if the price drops again) :)

Anyhow I have started on the case construction using a KVM that was no longer useful. It was a kvm for the old DIN style mouse keyboard connections. I started by gutting it and am making some custom front and back panels from a discarded atx case.

Here is the Gutted case and the bottom after I ground off the standoff's.


Nice shoes fool! ha, to lazy to edit them out. Any way after I gutted the KVM I needed to make custom front and back panels. I chose to cut these from a piece of steel recycled from an old atx case. Here is a picture of the cut out for the front.


All that is left is to cut out the the back and fill in the holes of the outer case that will not be used.


Yeah, now for the expensive part of all of my projects procurement. I am good at building, I suck at buying parts. Ugh I hate spending that last $200-$500 to finish a project.

Parts needed,
mini-itx motherboard
7" touch screen and mounting
atapi to ide converter for my slim line drive
and a car powersupply

Thursday, August 04, 2005

It takes an adult to admit that They don't know.

So between getting married, and trying desperately trying to get hired on as a full time employee I realized that I don't know enough to jump into the Minty Project with out help. It is a hard thing to do.

So I got a book for an introduction to electronics and am currently reading like I was still in college.

Friday, March 18, 2005

The long wait before the build

So though I have ordered the majority of the components that I will be needing for the build of Minty, I am still wating on my order from Maxim-ic. I ordered parts from TI almost a week later and have already recieved those parts, so I am begining to wonder. Maybe I should break down and actually pay for it?

Friday, March 11, 2005

Ordering of major components completed!

I just sampled the PCM1748 from TI.com as well as the TUSB3210PM, a USB controller. This means that I have now sampled all of the big pieces of the project, yeah! So now I need to go to Fry's to get the smt converters so I can test on bread boards and get this minty show on the road.

Just for fun, I was looking for a general purpose RISC machine with full os (not ce or Linux with no x-windows) and stumbled upon Littlechips.com's reduced instruction set mainboard with full peripherals. The linked product even comes with an LCD and can be booted from flash, Compact flash, or SD. All in all a sweet product, that comes with ce .net binary and Linux Kernel for development. The 6.4 inch screen appears to completely cover the mainboard and all it needs is a case and some form of a power supply and this could be a very mobile or compact computing platform with the 2.4 kernel.

I am looking for other small platforms like the PC104 and other low power consumption fully functional platforms so if you see any please post some links in the comments.

Sunday, March 06, 2005

Ah PCB123 hell

So I am starting to appreciate the work that Ladyada has put into the Mintymp3 player, and have decided to not send her any more "suggestions" on how sweet her project could be if she used it as an educational program. I downloaded and installed PCB123 and started laying out the electronics for my minty (killing time waiting for my sampled chips to come) and became very confused. I now know pcb creation programs are like CADs only much less fun to work with, I wasted well over an hour trying to make a chip that was not in their inventory. After it was over, you would think I had learned something; but you'd be wrong. The chip I was making was the PCM17481 the DAC that Ladyada thought would be a good replacement to the CS4340. Now I think I know why she did not feel like replacing it on her board; it probably was not listed in the standard parts, and she didn't want to have to invent the wheel. Not re-invent mind you, when you are working in these worthless programs (the one she was using is infinitely worse in my opinion than the one I am using) you actually have to invent. In one place I searched for Molex and found a large number of Molex connectors 2 to 40 pin, and then when I went to create a 50 pin straight through for the CF/IDE adapter and same search yielded no hits. Whatever.

So the net result of this week was nothing actually getting done (as far as the actual lay out of the board is concerned) I was so frustrated by the program I avoided it all 12 hours I would have otherwise worked on it and listened/read Robert Jordan books. Always next weekend I suppose.

Completely not related, it looks like the Servo magazine published the results of the servo hackasapien contest (not that they bothered to update the contest page, or even point to some of the sites up for the contest) so if you cared purchase the back issues Jan and Feb.

Friday, March 04, 2005

Yeah! Welcome to my hardware hacking.

Ok, so call it an attempt to avoid boredom, or just laziness in not setting up my own website for hosting this blog. I am starting this to document for anyone else that cares, my attempt to build fun and interesting things in this world of ours.

To start I have been reading a number of sites and blogs with regard to building and hacking interesting hardware. Hack A Day has offered a large number of fascinating projects and really has motivated me to try to actually build some of these great projects. One small problem though. I have lots of time, but very little actual electronics knowledge. So the dilemma begins, knowledge before experience or gain knowledge through experience? In other words to go back to school or school myself? Well I have decided both. I live close to Seattle Pacific University, and only work 3 days a week (3 X 12) so I have the weekdays to myself. To rapidly gain some electronics experience I purchased one of the Parallax Inc Basic Stamp® and project book kits, and a bread board for prototyping.

Thus far I am well into the Homework Board kit, and have found the course unfortunately aimed a little low. Though the intended audience is High School, I think they missed and hit Middle School. The book is well written, and the designs are made to push the students to questions that almost always are on the next page from when I started thinking about them; I have found that I want to move faster than the book is progressing.

I have found Minty mp3 which appears to meet my need for a challenge (more likely exceeds it), and have started to procure parts. I am following Ladyada's examples of how to sample from the large manufactures, and discovering the challenges of ordering from the different low volume electronics components providers across the WWW. To dated I have sampled the PIC18LF452 and am looking for low cost decoder, and DAC. I have already purchased a 2.2 gig Magic Store CF card and am still on the fence about the DC/DC converter and FM transmitter. The DC/DC converter really doesn't sell me because I was planning on using a cell phone battery, and the FM transmitter I am reluctant on only because I was hopping for a simple design with only an next, back and volume.

I will try to populate this blog with the progress of my creative process and hopefully others will find it helpful.